This post is part of the series 30 Days of Vue.
In this series, we're starting from the very basics and walk through everything you need to know to get started with Vue. If you've ever wanted to learn Vue, this is the place to start!

This post is part of the series 30 Days of Vue.
In this series, we're starting from the very basics and walk through everything you need to know to get started with Vue. If you've ever wanted to learn Vue, this is the place to start!
Yesterday, we saw how props can be used to pass data downwards from parent to child. Today, we'll see how custom events can facilitate communication in the opposite direction - from child to parent.
In the last two articles - we introduced components, seen how they help make our Vue applications more modular and taken a look at how props help pass data from parent to child components.
What if we needed to find a way to communicate information in the opposite direction (i.e. have the child component notify the parent about something)?
At the last stage of building our mock twitter app, we had the root instance render a tweet-component which subsequently rendered a tweet-content component of its own. Props were used to pass the relevant tweet data object from the root instance downwards to tweet-component and further down to tweet-content.
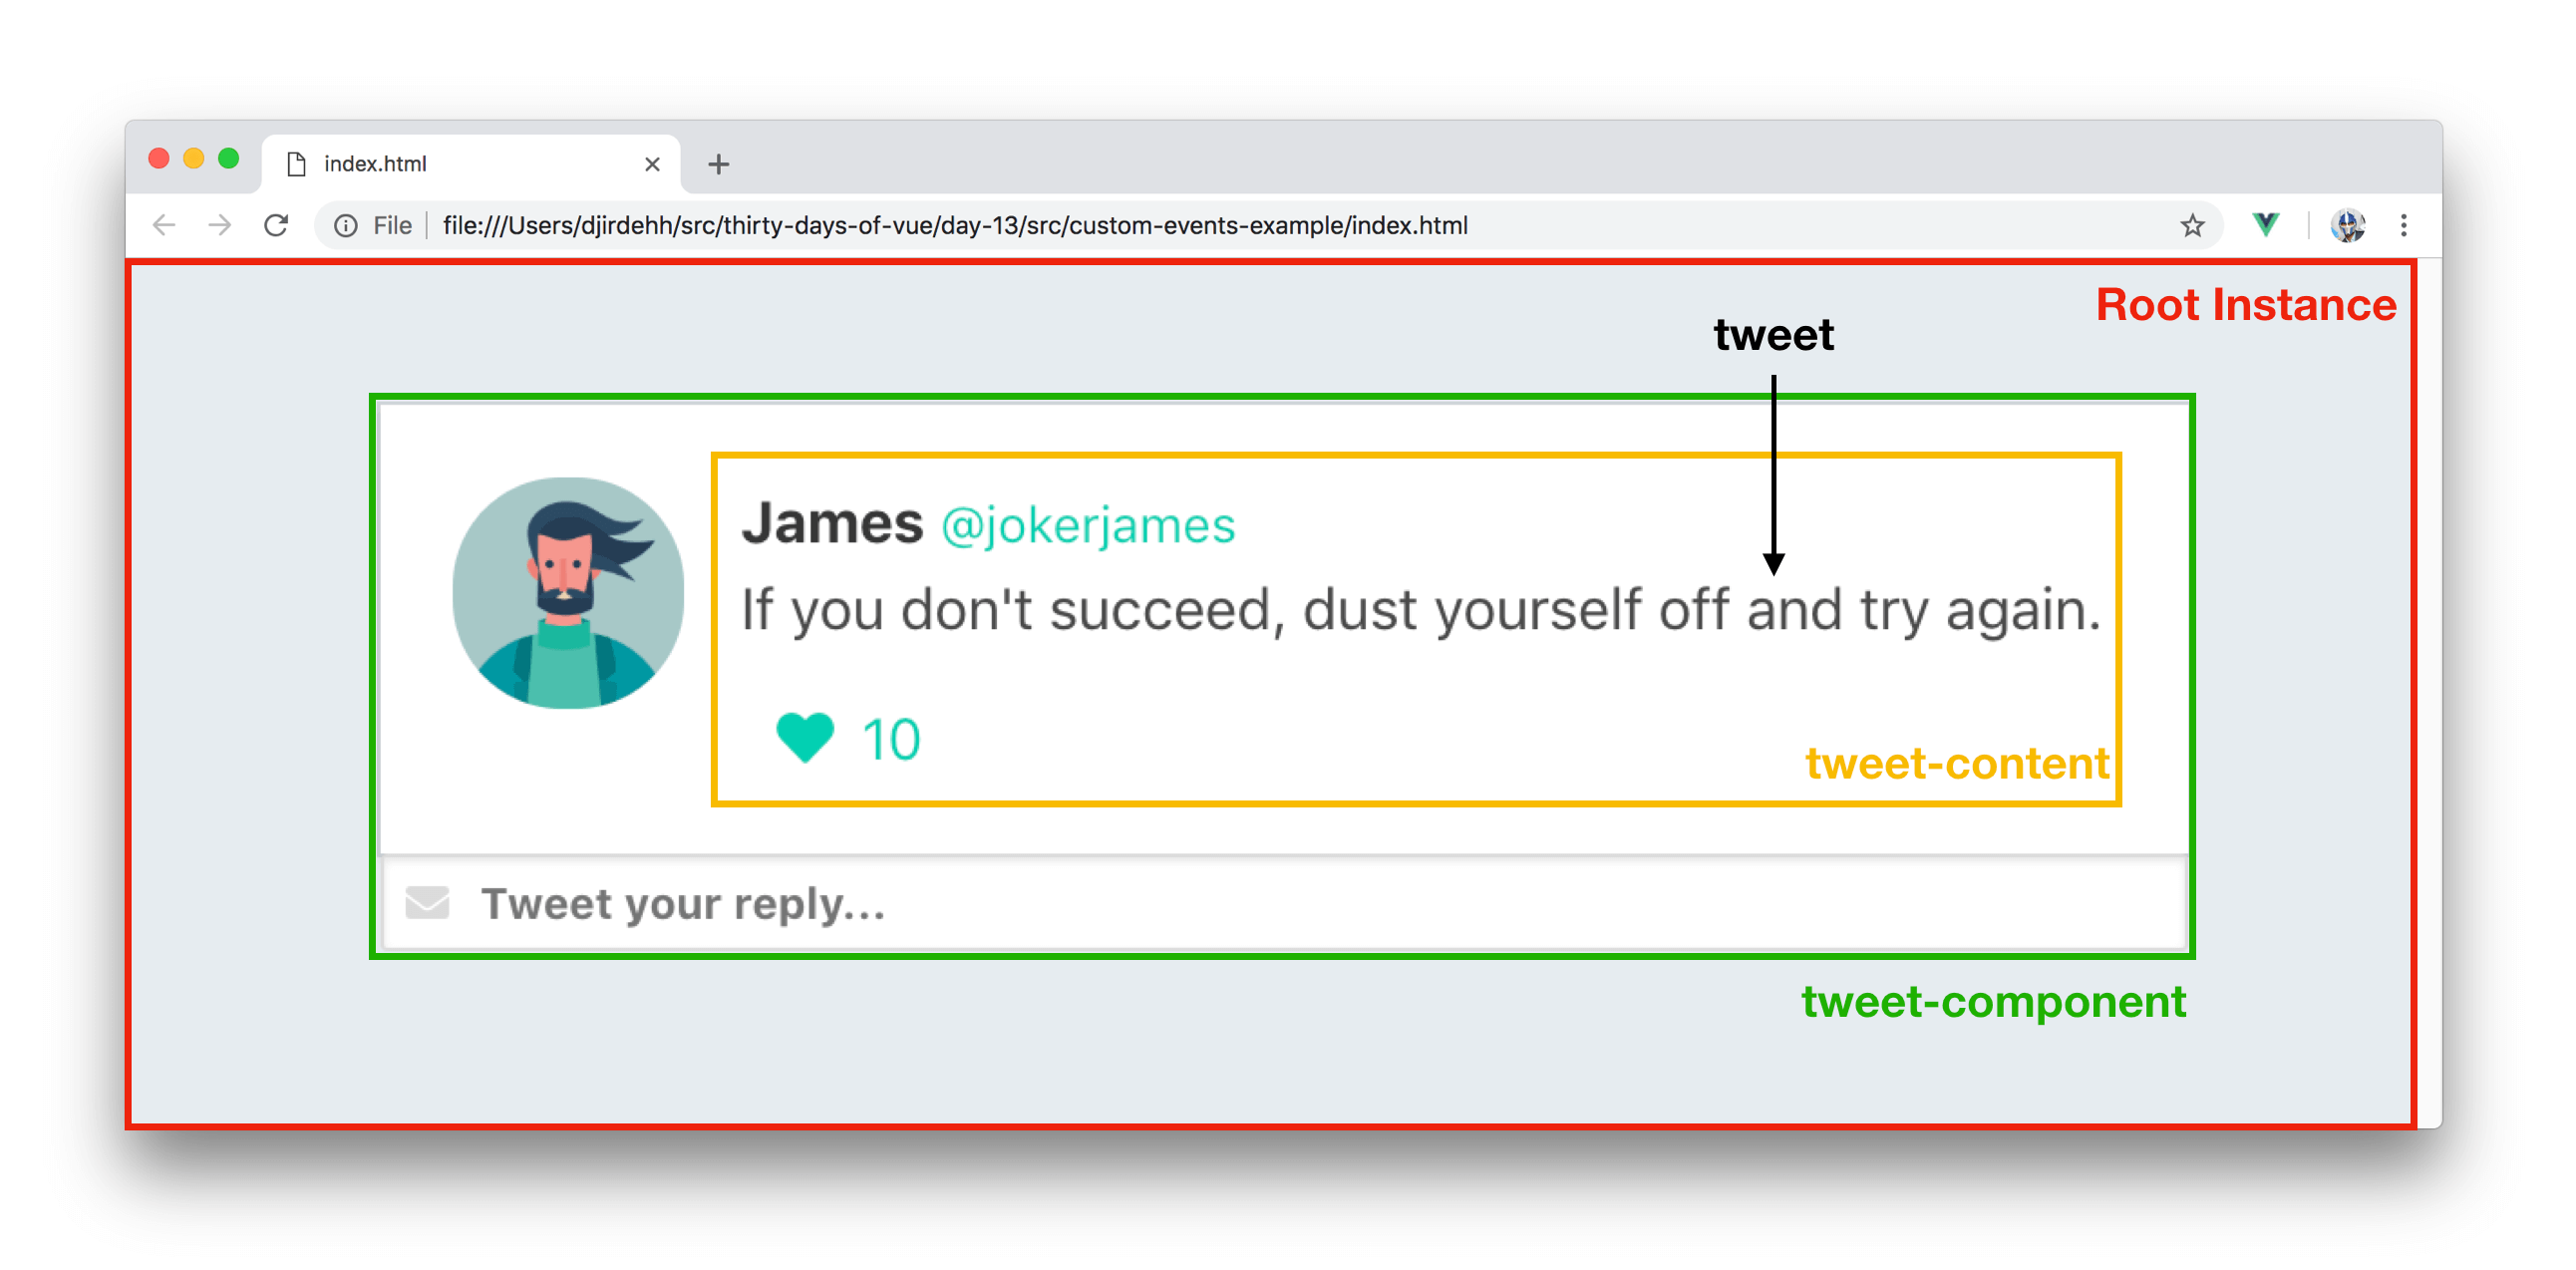
Assume we wanted to introduce a new link (or button) to the tweet element.
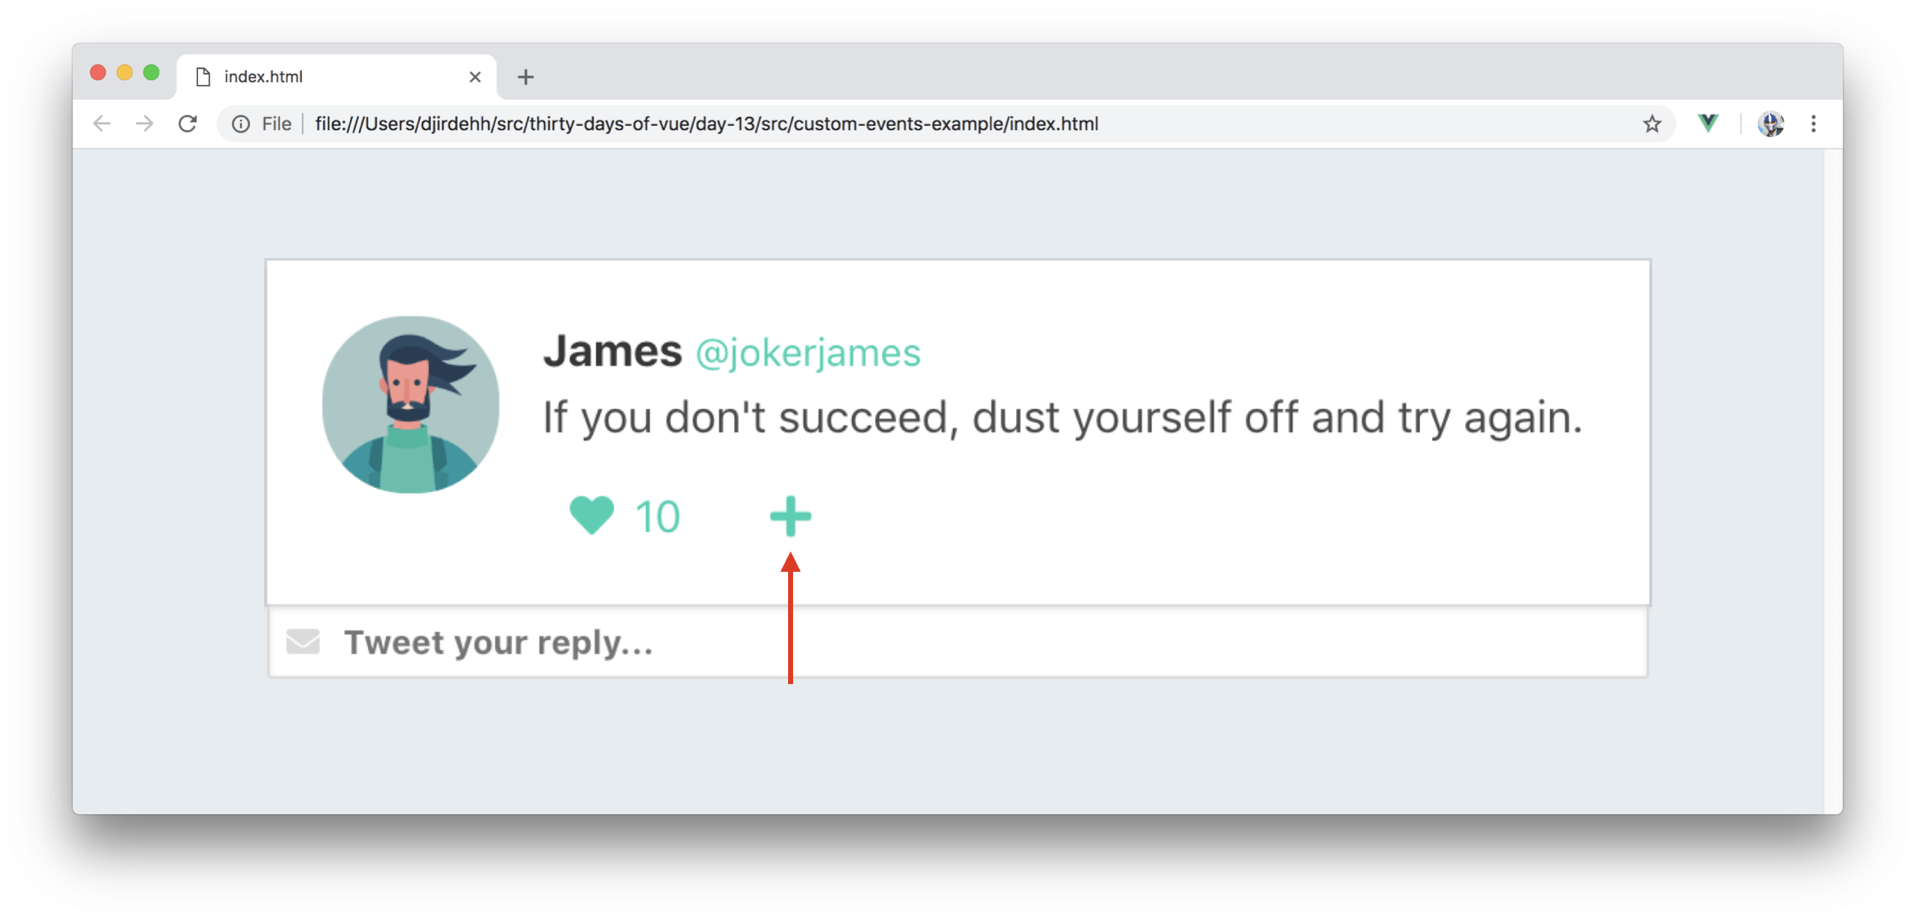
Upon click of the new link, let's attempt to re-introduce another copy of the same tweet element into the bottom of the list of tweets. Though this might be a strange use case, it'll be a useful way to show how we intend to communicate information from the child up to the parent.
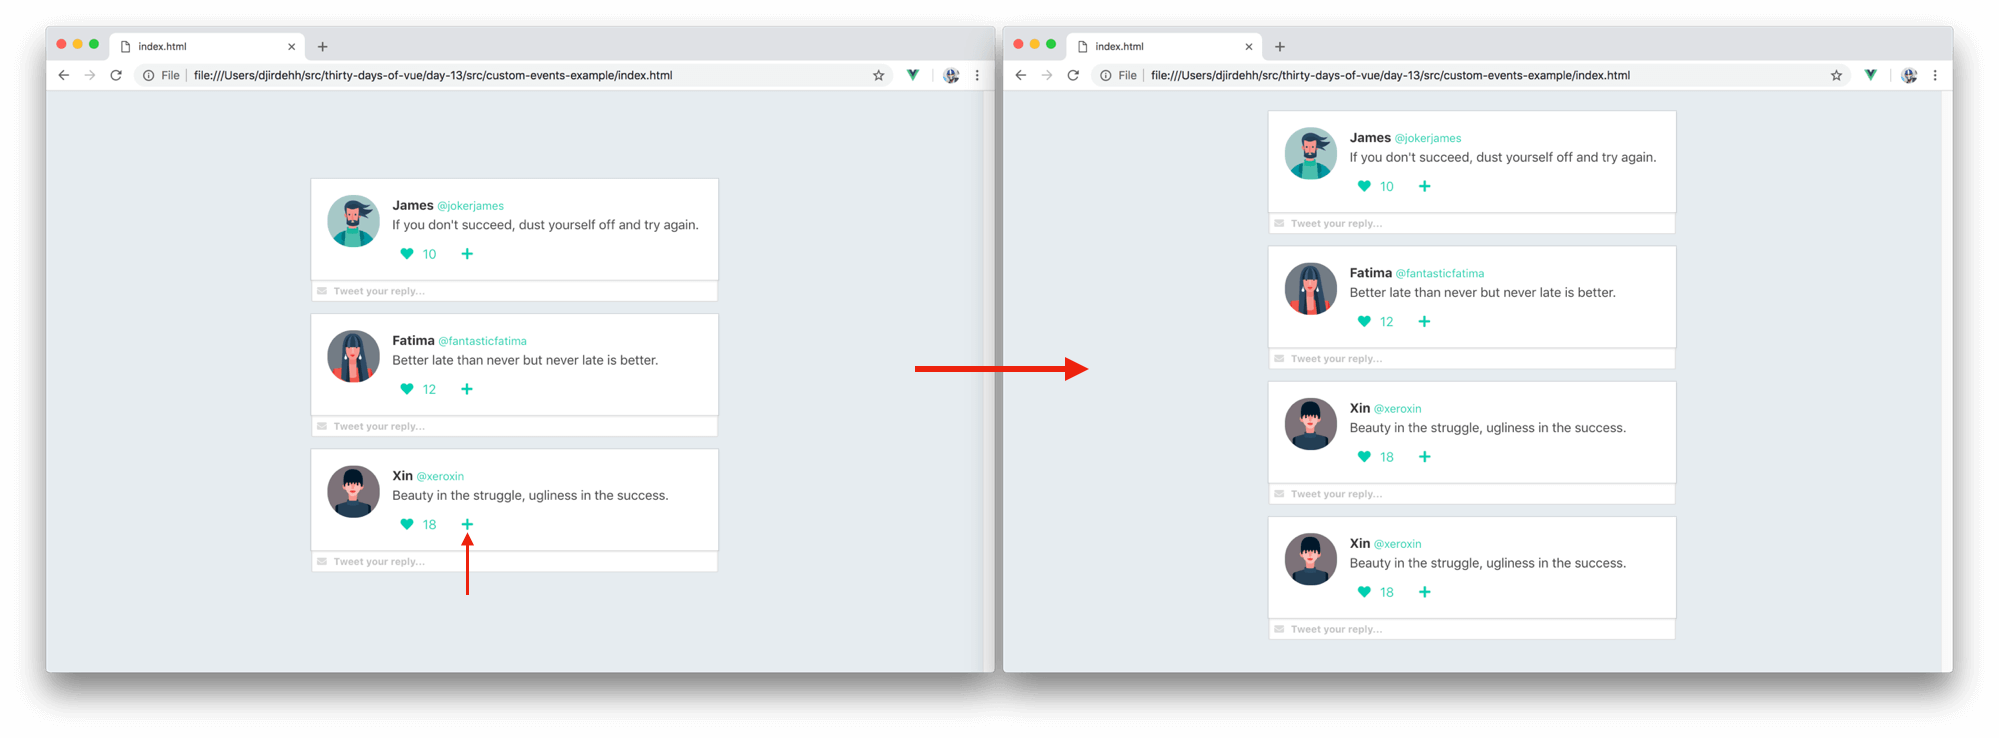
The link that adds a new element upon click will be part of the tweet-content component while the data (tweets array) that controls the tweet elements in our list is part of the root instance.
To add a new tweet to the list of tweets, we'll essentially need to push a new tweet object into the tweets array. When the user clicks the link to add another tweet, we'll need to have some sort of event propagated up to the root instance to change the data kept in the instance. We can’t use props for this since props can only be used to pass data downwards (parent to child to grandchild). Since we want to create communication in the opposite direction, we can use something known as Vue Custom Events.
Custom events in Vue behave very similar to native JavaScript custom events but with one key distinction - Vue custom events are used primarily for communication between components as opposed to communication between DOM nodes.
Vue custom events are triggered using $emit while specifying the name of the custom event:
this.$emit('name-of-event');
The $emit function can have a second optional argument that allows the caller to pass arbitrary
values along with the emitted event:
this.$emit('name-of-event', {
  data: {
    course: '30 Days of Vue';
  }
});
The
thiskeyword is a reference to the instance in which the event is being triggered. When declaring an event within the template of a component, thethiskeyword can be omitted.
In our mock twitter application, let’s update the template of tweet-content to contain the link that represents the ability to re-add the same tweet element to the bottom of the list. We’ll attach a click event listener on the link that when triggered will emit a custom event with the name of add. In the custom event declaration, we’ll also pass the tweet prop object as the event payload.
Vue.component('tweet-content', {
  template: `
    <div class="media-content">
      <div class="content">
        // ...
      </div>
      <div class="level-left">
        // ...
        <a class="level-item"
          @click="$emit('add', tweet)">
          <span class="icon is-small">
            <i class="fas fa-plus"></i>
          </span>
        </a>
      </div>
    </div>
  `,
  props: ['tweet']
});
Upon click of the newly added link, the add event will get propagated one level up to tweet-component. For parent components to be able to listen to events emitted by children, the v-on directive can be used to create a custom event listener. That custom event listener needs to be declared where the child component is being rendered.
Since tweet-component doesn’t have access to the tweets data array that we want to update, we’ll need to propagate the event one level higher. To achieve this, we’ll create a custom event listener in tweet-component to listen for when the add event is triggered in tweet-content. When the event is triggered, we’ll trigger another add event and pass in the event object (i.e. the tweet object payload). This updates the template of tweet-component to the following:
Vue.component('tweet-component', {
  template: `
    <div class="tweet">
      <div class="box">
        <article class="media">
          // ...
          <tweet-content :tweet="tweet"
            @add="$emit('add', $event)">
          </tweet-content>
        </article>
      </div>
    </div>
  `,
  props: ['tweet']
});
In the event listener, we’re able to access the event object that has been passed with $event.
In the root template, we can now create the final listener. We’ll specify the event listener where tweet-component is being rendered and when triggered call a method labelled addTweetMessage. addTweetMessage will pass in the $event payload as the only argument to the method.
      <tweet-component v-for="tweet in tweets"
        :key="tweet.id"
        :tweet="tweet"
        @add="addTweetMessage($event)">
      </tweet-component>
We’ll now create the addTweetMessage method in the root instance to introduce a copy of the event tweet object into our tweets array. To keep each tweet object unique, we’ll shallow copy the tweet event object and set the id of the copied object to be one greater than the last item in our tweets array. We’ll then push the newly copied item to the end of the data array with the help of the Array .push() method.
new Vue({
  el: '#app',
  data: {
    tweets
  },
  methods: {
    addTweetMessage(tweet) {
      let newTweet = {};
      let lastTweetObjectID =
        this.tweets[this.tweets.length - 1].id;

      // shallow copy tweet object
      newTweet = Object.assign({}, tweet);

      // set tweet id to be one greater than last tweet
      newTweet.id = lastTweetObjectID + 1;

      this.tweets.push(newTweet);
    }
  }
});
Awesome! We’ll now be able to add copied tweet elements to the end of the list by clicking the add icon on any tweet element.
Live version - https://30dofv-customevents.surge.sh
Let’s recap how data was manipulated in the app we just built. The root instance contains the tweets array and uses this array to render a list of tweet-component's. For every tweet-component rendered, a unique tweet object prop is passed in which is then subsequently passed in to a tweet-content component. In each of the components, we bind the relevant information from the available tweet prop on to their respective templates.
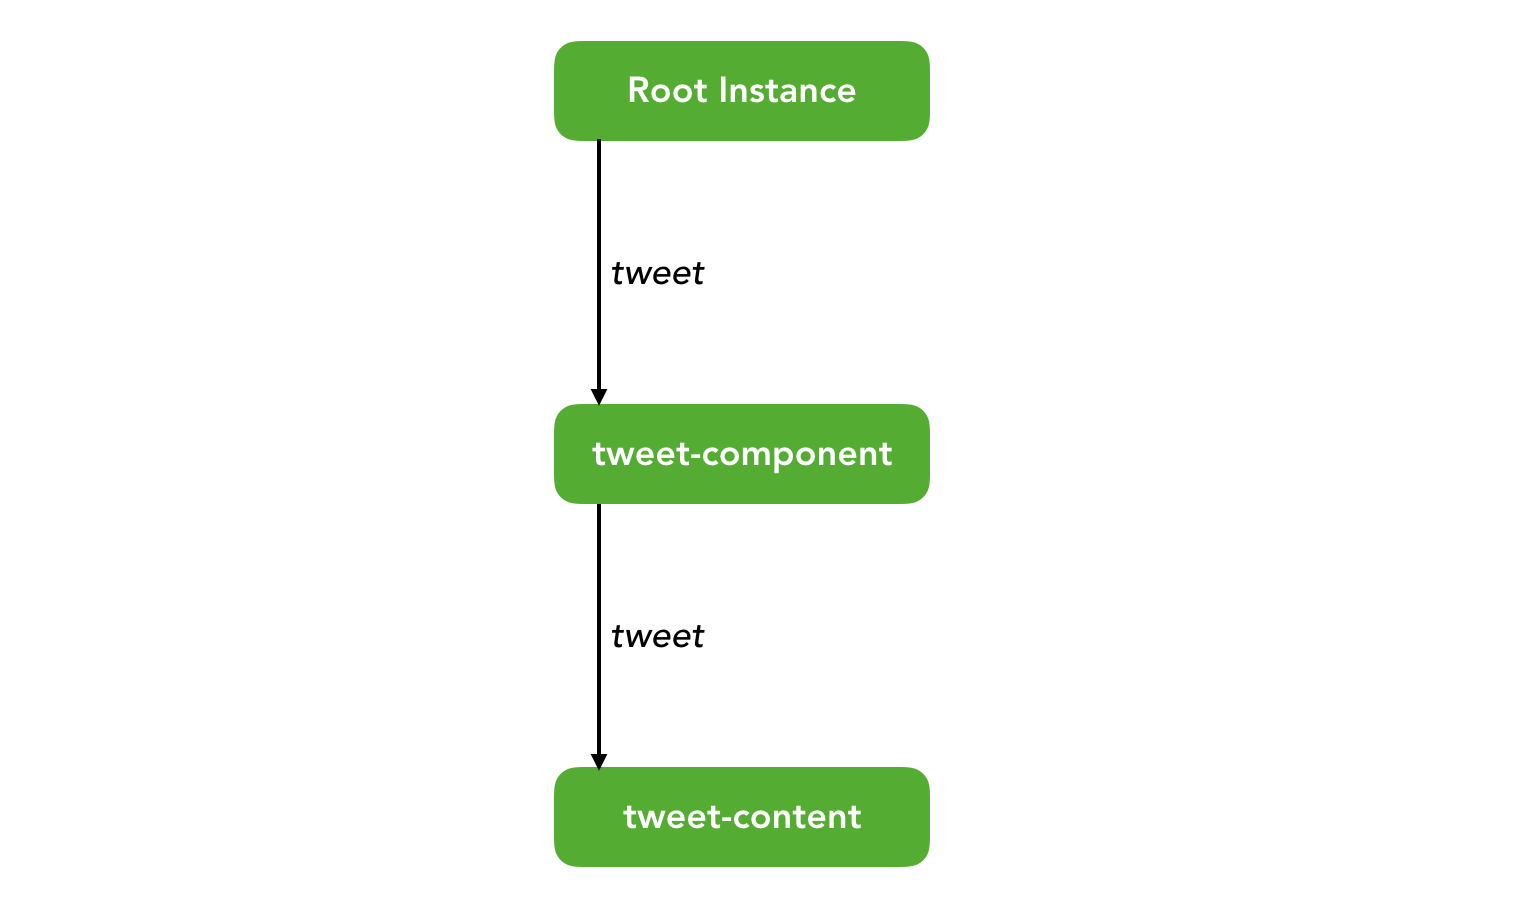
When the user clicks the icon to add another tweet element, the add event is triggered in tweet-content and listened for in tweet-component. The event listener in tweet-component triggers another add event that’s being listened for in the root instance. With every event trigger, the tweet object payload is being passed through.
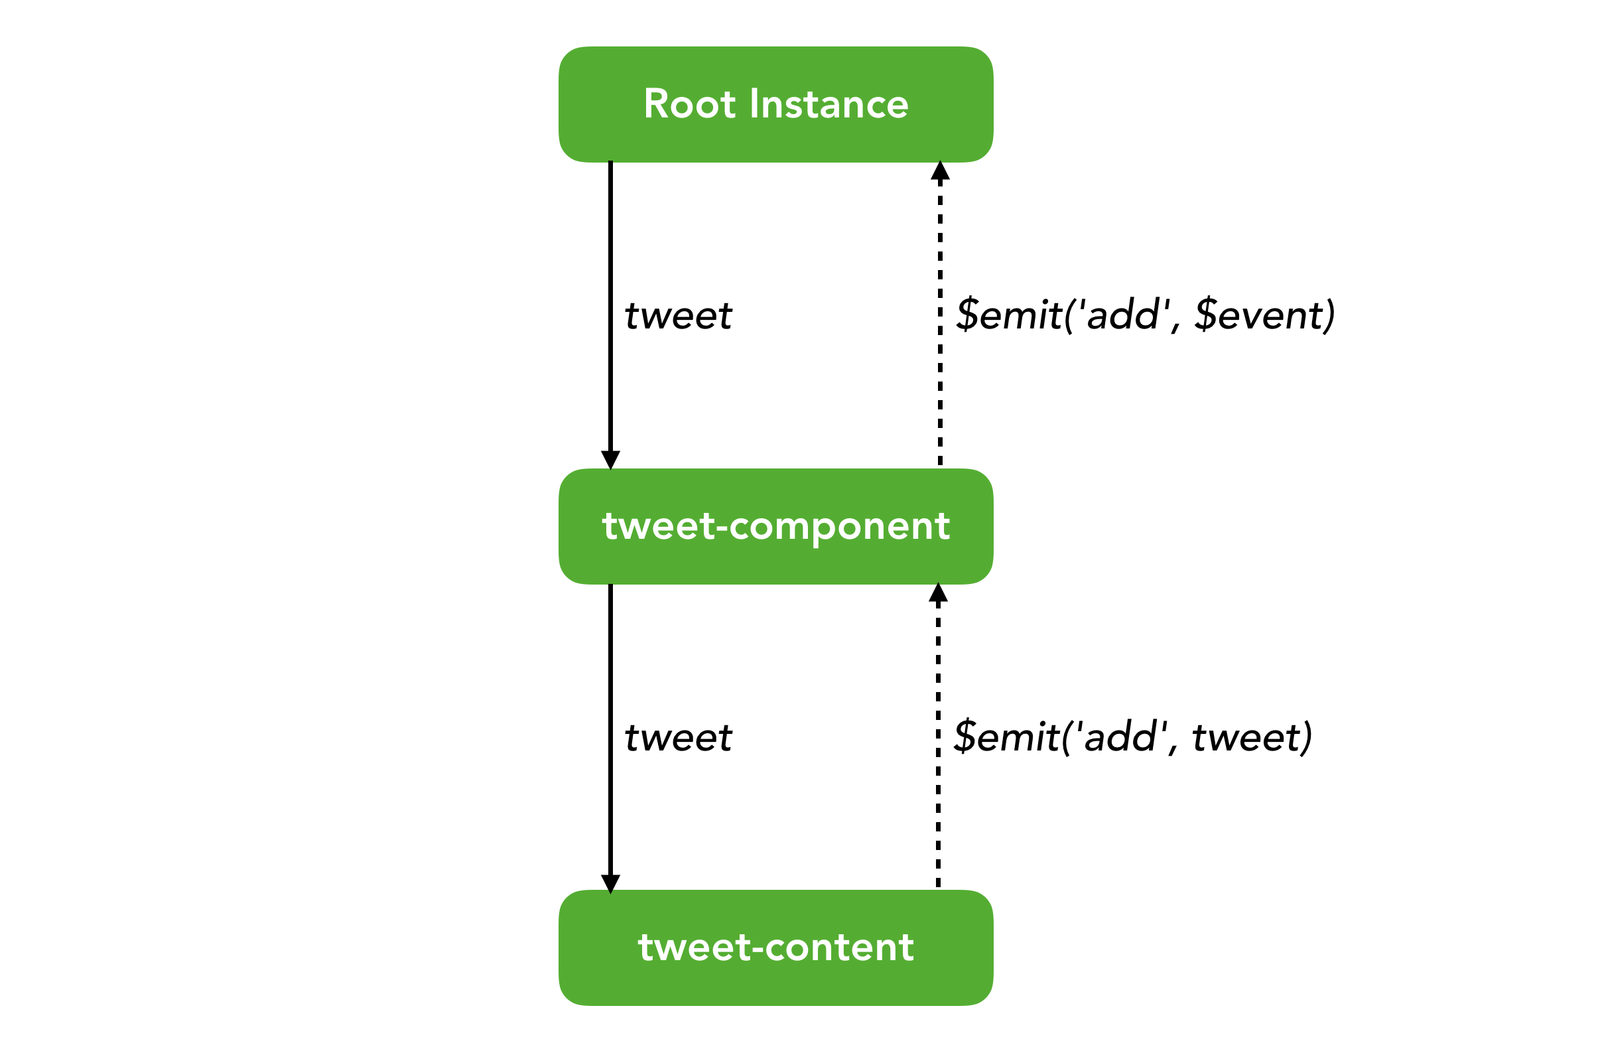
When the root instance event listener is triggered, the tweet object is shallow copied and added to the tweets array. In the root template, we use the v-for directive to render a list of tweet elements from the tweets array. As a result, when the tweets array is updated - our application is re-rendered to show the newly added element.
The way we've built our application isn't the only way to achieve what we've just done. In fact, the process of using just props and custom events to handle data gets more complicated when we need to think about not only parent-child relationships but sibling-sibling components as well. What we’re starting to discuss here is the basis of application wide data management or in other words state management. We’ll be taking a deeper look into different state management processes soon (article #19 to be exact) but in the coming articles, we'll be spending more time discussing Vue components.
The main takeway from this article is that props are always used to pass data downwards while custom events can be used to send information upwards.
The entire source code for this tutorial series can be found in the GitHub repo, which includes all the styles and code samples.
If at any point you feel stuck, have further questions, feel free to reach out to us by: