Animation
In order to animate a component on the screen, we'll generally update its size, position, color, or other style attributes continuously over time. We often use animations to imitate movement in the real world, or to build interactivity similar to familiar physical objects.
We've seen several examples of animation already:
- In our weather app, we saw how the
KeyboardAvoidingViewshrinks to accommodate room for the keyboard. - In our messaging app, we used the
LayoutAnimationAPI to achieve similar keyboard-related animations. - In our contacts app, we used
react-nagivation, which automatically coordinates transition animations between screens.
In this chapter and the next, we'll explore animations in more depth by building a simple puzzle game app. React Native offers two main animation APIs: Animated and LayoutAnimation. We'll use these to create a variety of different animations in our game. Along the way, we'll learn the advantages and disadvantages of each approach.
The next chapter ("Gestures") will primarily focus on a closely related topic: gestures. Gestures help us build components that respond to tapping, dragging, pinching, rotating, etc. Combining gestures and animations enables us to build intuitive, interactive experiences in React Native.
Animation challenges
Building beautiful animations can be tricky. Let's look at a few of the challenges we'll face, and how we can overcome them.
Performance challenges
To achieve animations that look smooth, we'll want our UI to render at 60 frames-per-second (fps). In other words, we need to render 1 frame roughly every 16 milliseconds (1000 milliseconds / 60 frames). If we perform expensive computations that take longer than 16 milliseconds within a single frame, our animations may start to look choppy and uneven. Thus, we must constantly pay attention to performance when working with animation.
Performance issues tend to fall into a few specific categories:
- Calculating new layouts during animation: When we change a style attribute that affects the size or position of a component, React Native usually re-calculates the entire layout of the UI. This calculation happens on a native thread, but is still an expensive calculation that can result in choppy animations. In this chapter, we'll learn how we can avoid this by animating the
transformstyle attribute of a component. - Re-rendering components: When a component's
stateorpropschange, React must determine how to reconcile these changes and update the UI to reflect them. React is fairly efficient by default, so components generally render quickly enough that we don't optimize their performance. With animation, however, a large component that takes a few milliseconds to render may lead to choppy animations. In this chapter, we'll learn how we can reduce re-renders withshouldComponentUpdateto acheive smoother animations. - Communicating between native code and JavaScript: Since JavaScript runs asynchronously, JavaScript code won't start executing in response to a gesture until the frame after the gesture happens on the native side. If React Native must pass values back and forth between the native thread and the JavaScript engine, this can lead to slow animations. In this chapter, we'll learn how we can use
useNativeDriverwith our animations to mitigate this.
Complex control flow challenges
When working with animations, we tend to write more asynchronous code than normal. We must often wait for an animation to complete before starting another animation (using an imperative API) or unmounting a component. The asynchronous control flow and imperative calls can quickly lead to confusing, buggy code.
To keep our code clear and accurate, we'll use a state machine approach for our more complex components. We'll define a set of named states for each component, and define transitions from one state to another. This is similar to the React component lifecycle: our component will transition through different states (similar to mounting, updating, unmounting, etc), and we can run a specific function every time the state changes.
If you're familiar with state machines, you might be wondering how our state machine approach will differ from normal usage of React component
state. Reactstateis an implicit state machine, which we often use without defining specific states. In our case, we're going to be explicit about our states, naming them and defining transitions between them. Ultimately though, we're just using Reactstatein a slightly more structured way than normal.If you're not familiar with state machines, that's fine. We'll be building ours together as we go through the chapter. Even if you're not familiar with the term "state machine," the coding style will probably look familiar, since we've used it elsewhere in this book already (e.g. the
INPUT_METHODfrom the "Core APIs" chapter).
Building a puzzle game
In this chapter, we'll learn how to use the React Native animation APIs to build a slider-puzzle game.
You can try the completed app on your phone by scanning this QR code from within the Expo app:

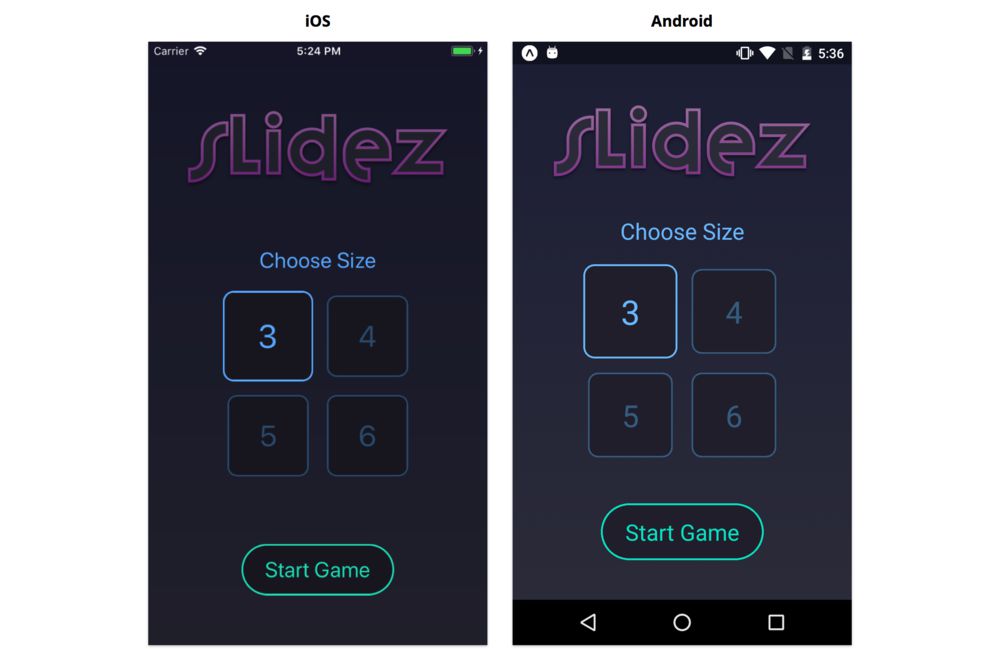
Our app will have two screens. The first screen let's us choose the size of the puzzle and start a new game:

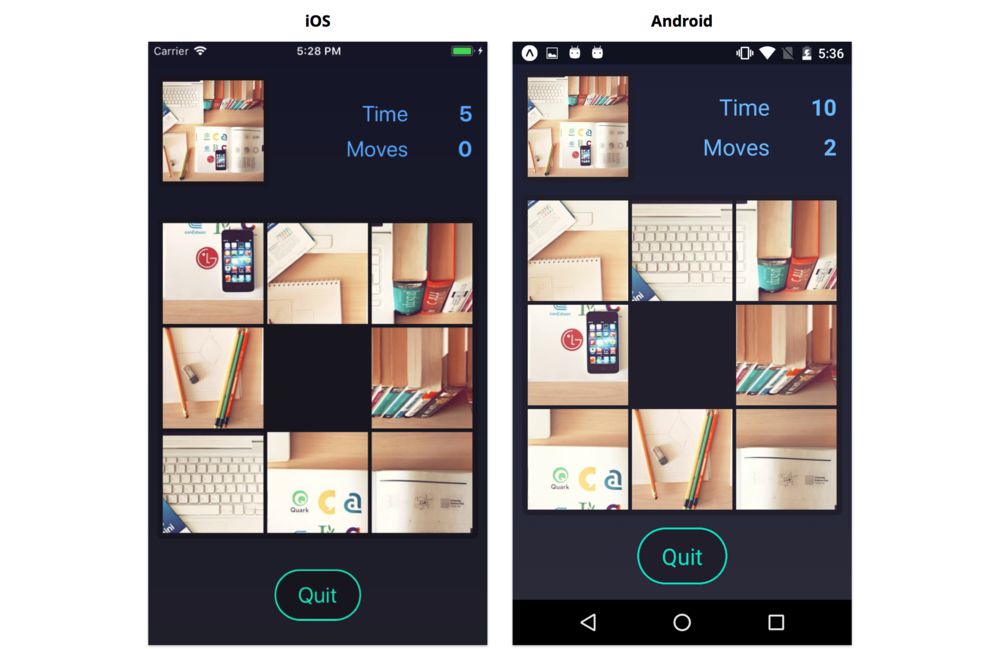
The second screen opens when we start the game. The goal of the game is to rearrange the squares of the puzzle to complete the image displayed in the top left:

Project setup
In this chapter, we'll work out of the sample code directory for the project. Throughout this book we've already set up several projects and created many components from scratch, so for this project the import statements, propTypes, defaultProps, and styles are already written for you. We'll be adding the animations and interactivity to these components as we go.
In the sample code there's a directory called checkpoints, which contains 2 different iterations of the puzzle app, checkpoints/puzzle-1 and checkpoints/puzzle-2. The finished project is in the puzzle directory.
We'll use the contents of checkpoints/puzzle-1 as a foundation for our app. Since this project includes a lot of existing code, we're going to work out of the checkpoints/puzzle-1 directory directly, rather than selectively copying over its contents. If you prefer, you may move or copy the entire puzzle-1 directory somewhere else on your computer.
Navigate into the checkpoints/puzzle-1 directory and install node_modules using yarn:
$ cd checkpoints/puzzle-1
$ yarn
It's normal to see tens of (yellow) warnings in the console as yarn installs your node_modules. Only (red) errors indicate a problem that likely needs resolving.
Once this finishes, choose one of the following to launch the app:
yarn start- Start the Packager and display a QR code to open the app on your phoneyarn ios- Start the Packager and launch the app on the iOS simulatoryarn android- Start the Packager and launch the app on the Android emulator
You should see a dark full-screen gradient (it's subtle), which looks like this:

Project Structure
Let's take a look at the files in the directory we copied:
├── App.js
├── README.md
├── app.json
├── assets
│   ├── logo.png
│   ├── [email protected]
│   └── [email protected]
├── components
│   ├── Board.js
│   ├── Button.js
│   ├── Draggable.js
│   ├── Logo.js
│   ├── Preview.js
│   ├── Stats.js
│   └── Toggle.js
├── package.json
├── screens
│   ├── Game.js
│   └── Start.js
├── utils
│   ├── api.js
│   ├── clamp.js
│   ├── configureTransition.js
│   ├── controlFlow.js
│   ├── formatElapsedTime.js
│   ├── grid.js
│   ├── puzzle.js
│   └── sleep.js
├── validators
│   └── PuzzlePropType.js
└── yarn.lock
Here's a quick overview of the most important parts:
- The
App.jsfile is the entry point of our code, as with our other apps. - The
assetsdirectory contains a logo for our puzzle app. - The
componentsdirectory contains all the component files we'll use in this chapter. Some of them have been written already, while others are scaffolds that need to be filled out. - The
screensdirectory contains the two screen components in our app: theStartscreen and theGamescreen. TheAppcoordinates the transitions between these two screens. - The
utilsdirectory contains a variety of utility functions that let us build a complex app like this more easily. Most of these functions aren't specific to React Native, so you can think of them as a "black box" -- we'll cover the relevant APIs, but the implementation details aren't too important to understand. - The
validatorsdirectory contains a custompropTypesfunction that we'll use in several different places.
Now that we're familiar with the project structure, let's dive into the code!
App
Let's walk through how the App component coordinates different parts of the app. Open up App.js.
App state
App stores the state of the current game and renders either the Start screen or the Game screen. A "game" in our app is represented by the state of the puzzle and the specific image used for the puzzle. To start a new game, the app generates a new puzzle state and chooses a new random image.
If we look at the state object, we can see there are 3 fields:
  state = {
    size: 3,
    puzzle: null,
    image: null,
  };
size- The size of the slider puzzle, as an integer. We'll allow puzzles that are 3x3, 4x4, 5x5, or 6x6. We'll allow the user to choose a different size before starting a new game, and we'll initialize the new puzzle with the chosen size.puzzle- Before a game begins or after a game ends, this value is null. If there's a current game, this object stores the state of the game's puzzle. The state of the puzzle should be considered immutable. The fileutils/puzzle.jsincludes utility functions for interacting with the puzzle state object, e.g. moving squares on the board (which returns a new object).image- The image to use in the slider puzzle. We'll fetch this image prior to starting the game so that (hopefully) we can fully download it before the game starts. That way we can avoid showing anActivityIndicatorand delaying the game.
App screens
Our app will contain two screens: Start.js and Game.js. Let's briefly look at each.
Start screen
Open Start.js. The propTypes have been defined for you:
  static propTypes = {
    onChangeSize: PropTypes.func.isRequired,
    onStartGame: PropTypes.func.isRequired,
    size: PropTypes.number.isRequired,
  };
When we write the rest of this component, we'll be building the buttons that allow switching the size of the puzzle board. We'll receive the current size as a prop, and call onChangeSize when we want to update the size in the state of App. We'll also build a button for starting the game. When the user presses this button, we'll call the onStartGame prop so that App knows to instantiate a puzzle object and transition to the Game screen.
The state object for this component includes a field transitionState:
  state = {
    transitionState: State.Launching,
  };
This transitionState value indicates the current state of our state machine. Each possible state is defined in an object called State near the top of the file:
const State = {
  Launching: 'Launching',
  WillTransitionIn: 'WillTransitionIn',
  WillTransitionOut: 'WillTransitionOut',
};
This object defines the possible states in our state machine. We'll set the component's transitionState to each of these values as we animate the different views in our component. We'll then use transitionState in the render method to determine how to render the component in its current state.
We define the possible states as constants in
State, rather than assigning strings directly totransitionState, both to avoid small bugs due to typos and to clearly document all the possible states in one place.
We can see that the Start screen begins in the Launching state, since transitionState is initialized to State.Launching. The Start component will transition from Launching when the app starts, to WillTransitionIn when we're ready to fade in the UI, to WillTransitionOut when we're ready to transition to the Game screen.
We'll use this pattern of State and transitionState throughout the components in this app to keep our asynchronous logic clear and explicit.
Game screen
Now open Game.js. Again, the propTypes have been defined for you:
  static propTypes = {
    puzzle: PuzzlePropType.isRequired,
    image: Image.propTypes.source,
    onChange: PropTypes.func.isRequired,
    onQuit: PropTypes.func.isRequired,
  };
The puzzle and image props are used to display the puzzle board. When we want to change the puzzle, we'll pass an updated puzzle object to App using the onChange prop. We'll also present a button to allow quitting the game. When the user presses this button, we'll call onQuit, initiating a transition back to the Start screen.
Like in Start.js, we'll use a state machine to simplify our code:
const State = {
  LoadingImage: 'LoadingImage',
  WillTransitionIn: 'WillTransitionIn',
  RequestTransitionOut: 'RequestTransitionOut',
  WillTransitionOut: 'WillTransitionOut',
};
We'll cover these states in more detail when we build the screen.
Now that you have an overview of how the state and screens of our app will work, we can dive in to building animations!
Building the Start screen
In order to build the Start screen, we'll use the two main building blocks of animation: LayoutAnimation and Animated. Each of these come with their own strengths and weaknesses. With LayoutAnimation we can easily transition our entire UI, while Animated gives us more precise control over individual values we want to animate.
Initial layout
Let's use LayoutAnimation to animate the position of a logo from the center of the screen to the top of the screen.
Initially we'll show this:

Then we'll animate the position of the logo to turn it into this:

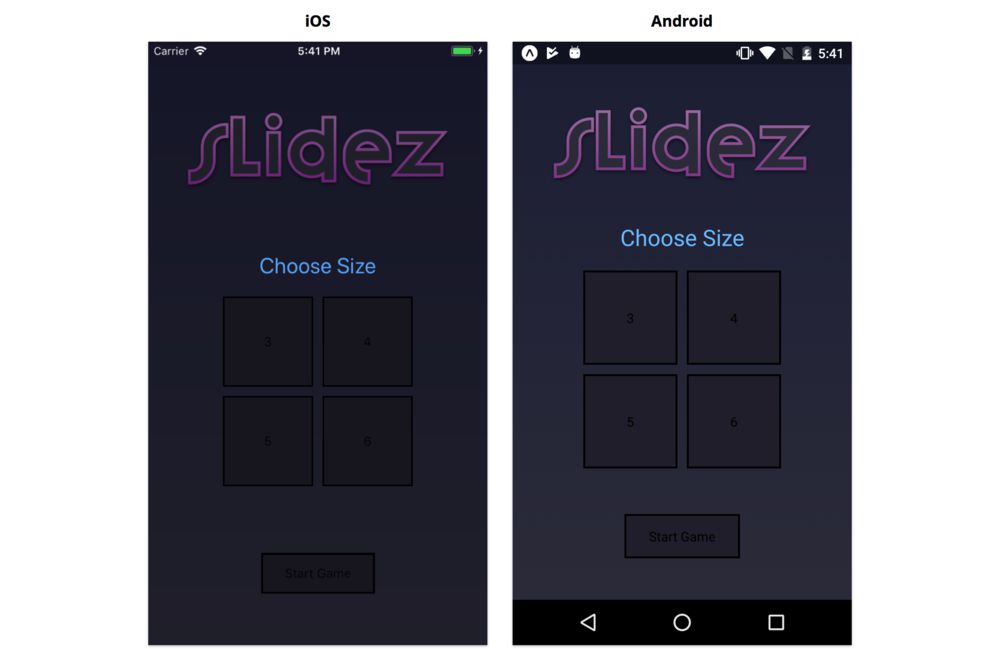
We're rendering placeholder buttons for now. We'll style the buttons and add some custom animations soon.
Open up Start.js. You'll notice the component's import statements, propTypes, state, and styles are already defined.
Let's start by returning the Logo and a few other components from our render method. Add the following to render:
// ...
