Building Your First Flask Page Template With Jinja2 and Variables
Rendering Pages
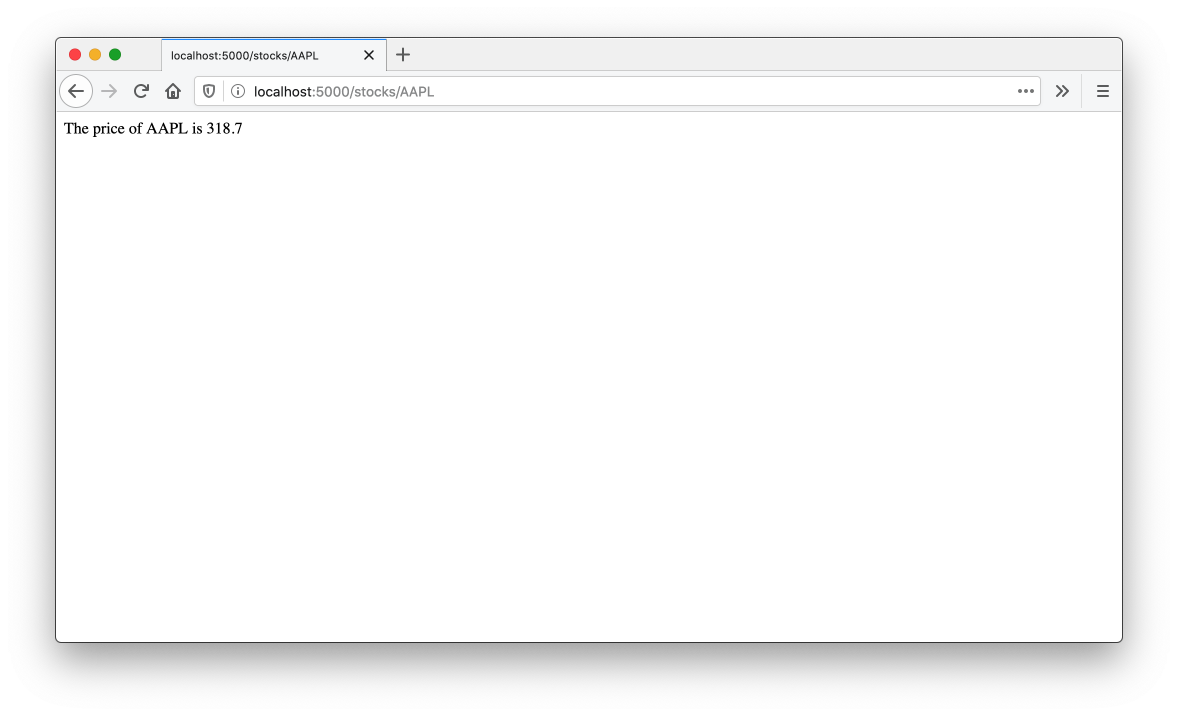
Right now our application looks a little plain, it's just some plain text with no real formatting.
After we make our changes in this chapter, our application will look a lot better.
So far, we've directly controlled what the server responds with by formatting strings directly in our Python functions. If we continued with this approach to build out a full HTML web page, we would have to write a lot of code to assemble together snippets of HTML. Fortunately for us, Flask comes bundled with a templating engine called Jinja2 which allows us to write something that looks like HTML outside of the main server logic and tell our routes to use specific templates when rendering the page.
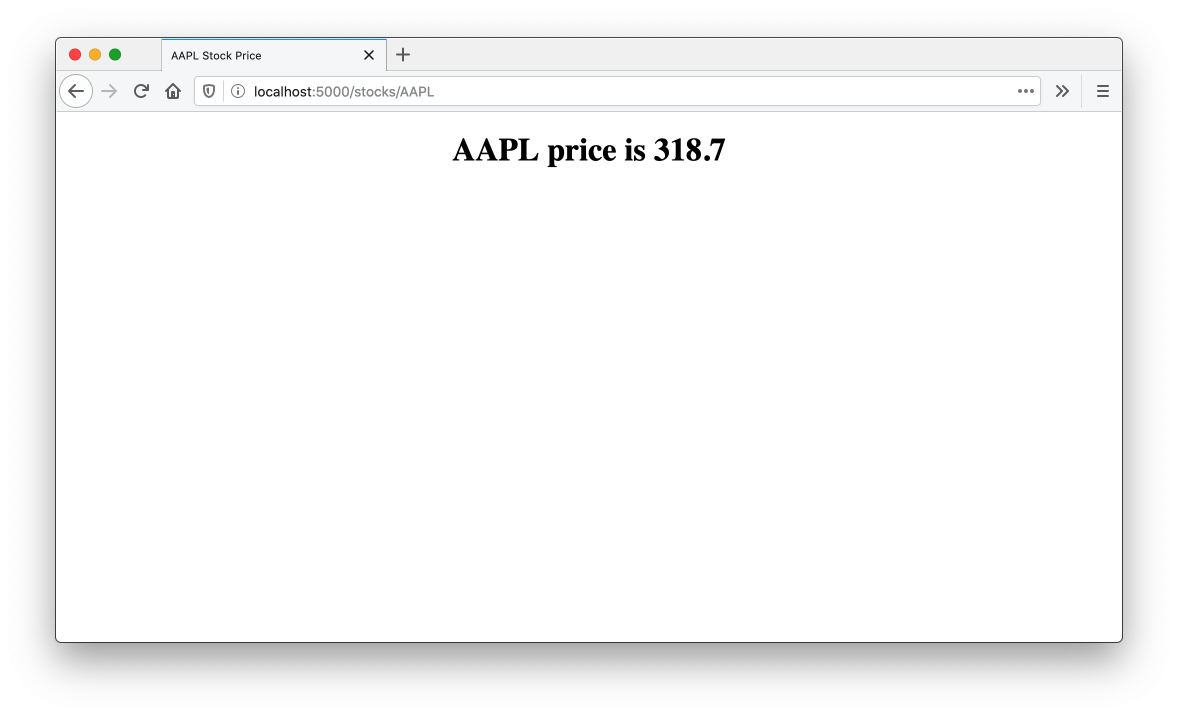
A simple example of a HTML page for our stock quote application might look something like this.
<html>
  <head>
    <title>AAPL Stock Price</title>
  </head>
  <body>
    <h1>
        The price of AAPL is $249.05
    </h1>
  </body>
</html>
We can take this HTML and turn into a template by using Jinja, we identify the places where we'd like to systematically replace parts of the template based on inputs or calculations from our application logic. In this case, there are three places we want to place content in, one in the HTML title tag for the the ticker and two inside of the h1 for the ticker and the price. In Jinja, we can denote these by giving the field a name and surrounding it with two curly braces on each side, which gives us the following template:
<!DOCTYPE html>
<html>
    <head>
        <title>{{ticker}} Stock Price</title>
    </head>
    <body>
        <h1 style="text-align: center;"> {{ticker}} price is {{stock_price}} </h1>
    </body>
</html>
There are three areas where data is being substituted, but Jinja will use the same value that is provided for
tickerin both locations that it is used when the template is rendered.
The convention within Flask applications is to store templates as a file under a folder called templates. If you save your template as stock_quote.html, your folder structure should look something like this:
stock-app (folder)
- server.py
- requirements.txt
Procfile (optional)
templates (folder)
- stock_quote.html (your template)
In the last chapter, we returned a string as the response to the request. Now that we have a template, we want to return the result of substituting the values we get from the Stock Quote API and the ticker into the template. To do that substitution we are going to use a function from Flask called render_template which takes in the name of a template and the values we'd like to use for the fields specified within the Jinja template file.
Inside of returning a string inside of the stock function in server.py, we're going to return the result of using render_template with the name of our template and pass in arguments for ticker and stock_price.
from flask import Flask, render_template

...

@app.route('/stocks/<string:ticker>')
def view_stock(ticker):
    stock_price = fetch_price(ticker)
    return render_template('stock_quote.html', ticker=ticker, stock_price=stock_price)
To run our Flask app, we can run FLASK_ENV=development FLASK_APP=server.py flask run within our virtual environment. Now we have some basic formatting.
Checkpoint: At this point, Your Flask server should look like this:
from flask import Flask, render_template
import requests

app = Flask(__name__)
API_URL = 'https://financialmodelingprep.com/api/v3/stock/real-time-price/{}'

def fetch_price(ticker):
    data = requests.get(API_URL.format(ticker)).json()
    return data["price"]

@app.route('/<ticker>')
def stock(ticker):
    stock_price = fetch_price(ticker)
    return render_template('stock_quote.html', ticker=ticker,
                           stock_price=stock_price)
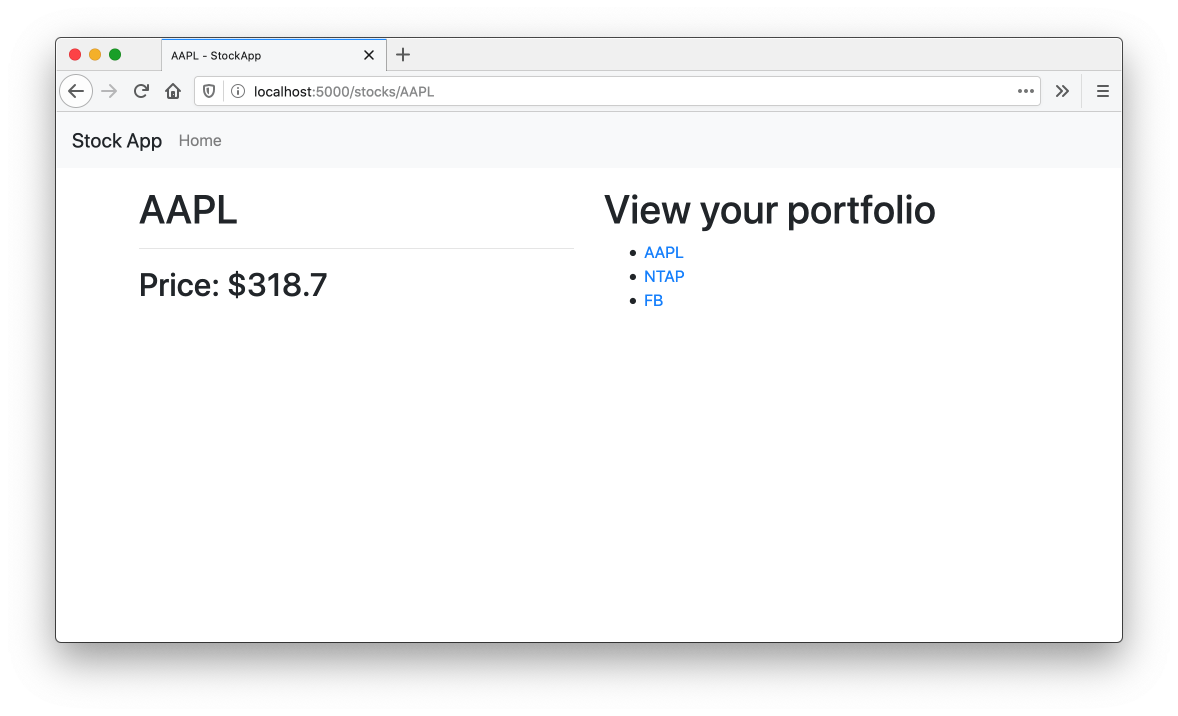
Adding styles
If we want to add some CSS, we could add a reference to an externally hosted stylesheet in the head section of the template. In this case, we can start to pull in the CSS for Bootstrap, a popular CSS framework.
<!DOCTYPE html>
<html>
    <head>
        <title>{{ticker}} Stock Price</title>
        <meta name="viewport" content="width=device-width, initial-scale=1, shrink-to-fit=no">
        <link rel="stylesheet" href="https://stackpath.bootstrapcdn.com/bootstrap/4.3.1/css/bootstrap.min.css" crossorigin="anonymous">
    </head>
    <body>
        <h1> {{ticker}} price is {{stock_price}} </h1>
    </body>
</html>
We will go into more detail about how to write our own styles in later chapters.
Adding Multiple Pages
The other route in our Flask application is the home page, and we haven't added anything to it. What we could do for that page is instead of showing an individual stock quote, we can link to the respective pages for a select list of stocks we care about. As we think of the HTML structure for that page, it might look something like this
This lesson preview is part of the Fullstack Flask: Build a Complete SaaS App with Flask course and can be unlocked immediately with a single-time purchase. Already have access to this course? Log in here.
Get unlimited access to Fullstack Flask: Build a Complete SaaS App with Flask with a single-time purchase.

[00:00 - 00:20] In this video, we're going to cover how to make our stock ticker application look a little better by using templating. Right now, everything we've done to date within our flask applications has involved returning a string directly from our function and it ends up looking something like this.
[00:21 - 00:28] So this technically works, but it just doesn't look very good. We'll probably want to make our pages look better, something like this.
[00:29 - 00:41] And to do that, we're going to have to use HTML. A really basic, but still improvement on our existing version is to return a very basic HTML document.
[00:42 - 00:52] Now we wouldn't want to construct this entire string right within our Python file. You can imagine how that would get messy if our documents got any more complicated than this.
[00:53 - 00:59] So what we're going to use are template files. Mask has some built in tools here to make this easy for us.
[01:00 - 01:11] Let's take a look at what our existing application looks like right now. And what we will eventually turn it into is something that looks more like this .
[01:12 - 01:17] All right. So in VS code, we're going to do a few things.
[01:18 - 01:26] First off is we're going to create a folder called templates. And templates folder is where class is going to go to look for our HTML template files.
[01:27 - 01:31] Then we're going to create a file within it. And let's call this one stock quote dot HTML.
[01:32 - 01:38] And within this, let's define some basic content. So we're going to need to have a title for our document.
[01:39 - 01:46] I'm going to call mine a PL stock quote. All right.
[01:47 - 01:58] So we have a title and we're going to need a body as well. And for that body, we can put H one tag in there saying the price is dollar XYZ .
[01:59 - 02:06] And obviously this company will also change. So we're going to maybe say question mark there for now.
[02:07 - 02:15] Now let's make sure our server actually uses this. And to do that, we're going to have to import this render template file function from flask.
[02:16 - 02:24] So do that. We're going to import render template and then reference the relative path of stock quote dot HTML in the templates folder.
[02:25 - 02:33] So that's just stock quote dot HTML. So let's try that and actually look at what our application looks like now.
[02:34 - 02:40] Okay. So we got our templates to be rendering going back in VS code.
[02:41 - 02:56] We actually want our template to be dynamic. And so the way we can do that is flask uses templating language called ginger, which allows us to insert variables into our template using the syntax.
[02:57 - 03:09] So maybe we'll call this one ticker and we can do something like this. And then we can say, all right.
[03:10 - 03:19] So to do that, now we're going to have to pass in those variables. Ginger does not automatically get access to everything that's defined within the function.
[03:20 - 03:29] We actually have to explicitly pass that in. So we'll say the ticker is equal to the ticker and the stock price is the price .
[03:30 - 03:34] All right. So let's see what happens in Firefox now.
[03:35 - 03:40] All right. So it looks pretty good.
[03:41 - 03:55] One thing we can do as a small improvement is we can do uppercasing here and our template looks a little better. Not that we can see.
[03:56 - 04:03] Okay. So our document looks okay, I guess, but it still could be better.
[04:04 - 04:18] One thing we can do to make it better is import some default styling like fonts and other things. So the way we can do that is what I'm going to do is I'm going to import a CSS library called bootstrap to provide us with some same defaults values.
[04:19 - 04:23] So once I've added that to our head, we can check our terminal and see what it looks like. Okay.
[04:24 - 04:30] So it's given us a better font. So it looks a little better, but we're still going to have to do more work on the layout.
[04:31 - 04:36] Okay. So let's add some bootstrap styling by default.
[04:37 - 04:42] Maybe the first thing I'll add is a nav bar. So this nav bar will make our page look a little better.
[04:43 - 04:45] Okay. So that's pretty good.
[04:46 - 04:54] And then we'll add some center content. And I'm just going to create a bootstrap row here that looks like this.
[04:55 - 04:58] Okay. So that looks a lot better.
[04:59 - 05:11] You can add some margin here too. And then we see here we have a page that looks a lot better.
[05:12 - 05:21] Now let's go ahead and think about our homepage. If we go to localhost, the homepage gives us a pretty useless page.
[05:22 - 05:34] Let's go ahead and think about what we can add here. One thing that would be useful is just some links to other pages or perhaps just a homepage to say what the application does.
[05:35 - 05:51] So let's call this our homepage or maybe index dot HTML. And then we can copy paste all of this logic here, which is a little dupl icative here.
[05:52 - 05:59] So we're going to address that in a moment. And once we've set that up, we now have a homepage that we can render.
[06:00 - 06:14] So going back in server dot HTML, so returning try stock up a string right that we're going to return, turn index dot HTML. Now there's no variables in here once we remove this.
[06:15 - 06:29] So if we call this just stock app and we refresh and go back to Firefox, it looks something like this. I forgot a container.
[06:30 - 06:38] So let's go back into our codebase and add that. But while we're here, let's talk about how the logic is really duplicative here .
[06:39 - 06:50] There's a lot of stuff that is duplicated between the two pages and really the only part that's unique is maybe this part right here. Everything else is basically the same.
[06:51 - 06:58] And maybe there's some differences in the title. One other note I'll make is that Ginger allows variables to be undefined.
[06:59 - 07:14] So for example, if I kept that ticker reference there and we went back into Firefox, you'll notice that it worked just fine. And that's because it evaluated to none and Ginger just left a blank.
[07:15 - 07:18] So we don't need that for now. So let's leave it here.
[07:19 - 07:28] We have a working application, but there's some code duplication. So let's think about how we can solve some of that by using layouts.
[07:29 - 07:42] So what we want to do is we want to create something that essentially allows us to predefine the fixed parts and allow each template to define the part that makes them unique. So let's go and create a new file.
[07:43 - 07:57] We're going to call it base layout dot HTML. And in the base layout, we're going to copy the entire file and just leave out the part that is unique to our templates.
[07:58 - 08:08] So we already know looking at both of our templates that the container is going to be there for both. We probably want to define a margin on the container as well.
[08:09 - 08:17] So we might as well just to find that in our base layout as well. So we're going to say div container and we're going to define some margin there .
[08:18 - 08:24] All right. Now we want to tell Ginger that this space is something that we think should be templated in.
[08:25 - 08:37] So the way we're going to do that is by defining a block in Ginger. And we're going to say the templates that use this layout will give us some content in this block.
[08:38 - 08:48] Similarly, we're going to do something on the title because the title is going to change for each page. So we're going to call this block the title block.
[08:49 - 08:55] But unlike the content block, we're going to provide a default value. So we're going to say view stock prices.
[08:56 - 09:05] So if a template doesn't tell us what's supposed to be in the title block, it 'll just use that. And then maybe we can add a post fix there called stock app.
[09:06 - 09:10] All right. So we now have a base layout.
[09:11 - 09:19] Let's try and make our templates use that. So going into index.html in order to use the template, we're going to do a few things.
[09:20 - 09:30] The first one is that we're going to indicate that this page actually uses that way out. And so we're going to say extends the base layout dot HTML.
[09:31 - 09:39] That tells Ginger that it's supposed to look at the base layout there to figure out what's going on. Then we're going to define maybe a title.
[09:40 - 09:45] So we can say like homepage for now. All right.
[09:46 - 09:57] And then we're using this ginger block tags to define what goes in there. So similarly for content, we're just going to find the parts that are specific to our app.
[09:58 - 10:02] So none of this stuff is specific to our app. Really it's only just this.
[10:03 - 10:10] So we can go ahead and define that here. Okay.
[10:11 - 10:18] So we now have a application that uses the base layout. Let's go into Firefox and see if this worked.
[10:19 - 10:22] Okay. So I just refresh the page and it worked.
[10:23 - 10:33] And if we look at the source code, it's exactly like you'd expect. This template has been substituted in where we expected it to be.
[10:34 - 10:45] Let's go and do the same thing for our stock quote page. I'm just going to copy all of this content and replace it with the appropriate value.
[10:46 - 10:59] So for this one, for the title, we want it to be this and for the content that 's unique, it's really just this content. Now you might be wondering, we defined this row class in both of them.
[11:00 - 11:09] Would we want to define it globally? It just so happens that both of these use the row class, but I don't think every single page will start with the row.
[11:10 - 11:17] So we don't want to constrain ourselves too much by adding that in the base layout. Okay.
[11:18 - 11:28] So now both of our applications use templates here. So if we go to stock, that also uses a template and it's substituted in exactly like you'd expect.